Why the classic 8–10 feet rule fails real homes
Most security camera guides repeat the same advice about mounting at 8 to 10 feet, yet that height was designed mainly to stop people from grabbing cameras rather than to help you identify anyone. When you look at actual incidents on Ring Stick Up Cam, Blink Outdoor 4, or older Arlo cameras, you see a pattern; faces are tiny in the video, the angle is steep, and the field of view wastes pixels on your porch floor. A serious security camera mounting height guide has to start from what you want to capture, not from a generic anti-tamper number.
Think about your existing camera system and how you actually review footage after an event, because you are rarely asking whether the cameras stayed safely on the wall and almost always asking whether the security cameras captured a usable face or license plate. When a camera is mounted too high, the downward angle flattens features, so even a 2K or 4K security camera system can produce video that fails basic identification standards at key entry points. Independent testing and widely cited forensic imaging guidelines suggest that once the viewing angle exceeds roughly 30 degrees from eye level, faces become much harder to match, especially on budget systems with aggressive compression and limited dynamic range (see, for example, EN 62676-4 recommendations on identification views and pixel density).
Mounting height also changes how infrared night vision behaves, which matters because most break-ins happen in low light areas around a property. Many outdoor cameras advertise 25 to 30 metres of IR range, yet when you install security devices at 4 metres high, people walking close to the wall fall into blind spots under the cone of light. Comparative lab tests from independent reviewers show that most built-in infrared illumination delivers genuinely detailed footage only within about 7 to 9 metres, and a camera height of around 2 to 2,5 metres often keeps subjects inside that effective IR field of view, which means sharper night video and fewer washed-out white blobs.
There is another hidden cost to the one-size-fits-all 8 foot rule, and you feel it every time you scroll through motion alerts that show only the tops of heads or the hoods of cars. False alert fatigue is not just about motion sensitivity; it is also about poor camera placement that forces you to over-zoom and guess what happened at the edge of coverage. When you tune mounting height to the specific areas you care about, your security systems start to feel like tools instead of noisy alarms.
Professional installation teams know this, but even they sometimes default to high mounting because it is faster and looks symmetrical across a façade. I have walked past new builds where every outdoor security camera sits in a neat line under the eaves, all at the same height above the ground, and all pointed at driveways from far too steep an angle. Those camera systems will record plenty of motion, yet when something serious happens the owners will realise their security system prioritised aesthetics over evidence.
For a homeowner upgrading from a basic camera system like Blink to a mixed setup with Reolink PoE and Eufy SoloCam S340, the key mindset shift is simple; you are no longer buying gadgets, you are designing a security tool. That means thinking in terms of roles for each camera, such as identification, overview coverage, or deterrence, and then matching the mounting height and angle to that role. Once you do that, the old 8 foot rule starts to feel as outdated as analog video recorders and coaxial-only systems.
Front doors and porches: identification first, then context
Your front door is where camera height mistakes hurt the most, because this is the one place you consistently get cooperative subjects looking toward the lens. If you mount a security camera at 2,5 to 3 metres above the porch, you protect it from tampering but you also force the camera to look down at a sharp angle that hides facial features under caps and hoods. A better security camera mounting height guide for front entry points starts with a simple rule; one camera at roughly eye level for faces, and a second camera higher for context if your budget allows it.
For the identification camera, aim for a camera height of about 1,7 to 2 metres, which is close to eye level for most adults and keeps the field of view centred on faces rather than doormats. When you review video from a Nest Cam Battery or Arlo Pro 5S mounted at this height, you will notice that facial recognition by humans becomes much easier, even before any algorithmic facial recognition system gets involved. The face fills more of the frame, often approaching the forensic guideline of at least 120 pixels across, which is where individual features stay clear after compression and motion blur (a figure echoed in many law-enforcement training materials on pixel-per-face requirements).
That lower mounting height does increase the risk of someone trying to cover or twist the camera, yet in practice most opportunistic intruders move quickly and avoid lingering at well lit doors. If you are worried about deliberate attacks on your security cameras, pair the low camera with a second outdoor camera mounted higher, around 2,7 to 3 metres, angled to capture the whole porch and adjacent areas. This two-camera placement strategy gives you both identification and coverage, and it also creates overlapping video that can help reconstruct events if one camera fails.
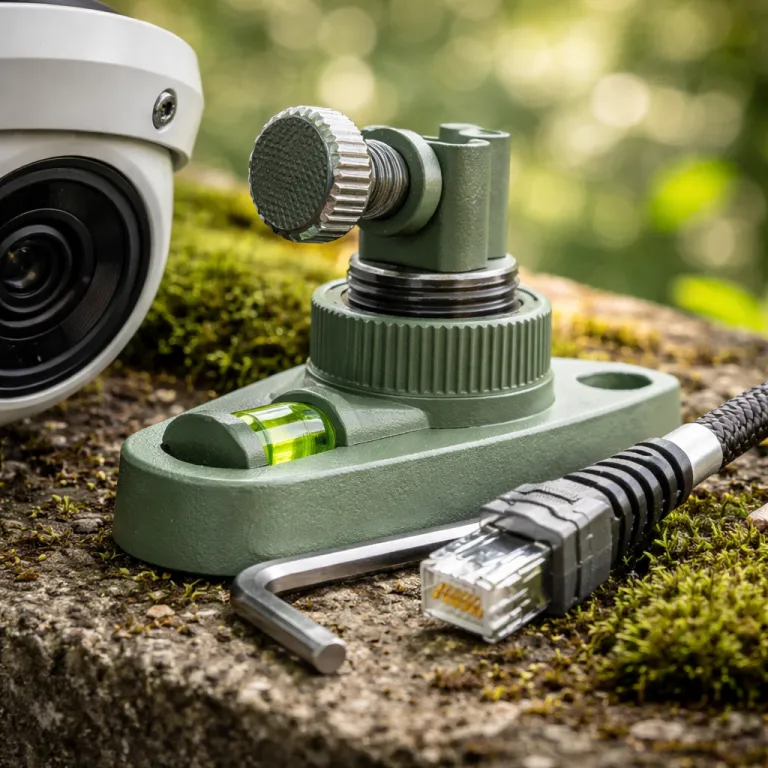
Doorbell cameras like Ring or Eufy are already designed for this lower mounting height, but they are often installed too far to the side, which skews the angle and introduces blind spots. Try to keep the lens within 30 centimetres horizontally of the centre line of the door, so visitors naturally face the camera when they look at the handle or peephole. If your door has sidelights or glass panels, use the camera’s wedge kit to adjust the angle and avoid reflections that can ruin night vision performance.
For porches with steps, measure height from the top step where people actually stand, not from the ground below, because what matters is the relative camera height to the subject’s face. A camera mounted at 2 metres above the landing behaves very differently from one at 2 metres above the driveway, even if the physical mounting point is the same. This is where many generic security systems guides go wrong; they quote a number without asking where people will be when the camera records them.
If you want to go deeper into where to mount outdoor cameras for maximum coverage and fewer false alerts, you can study specialised placement advice that focuses on balancing angle, coverage, and motion zones. Those resources often show how a small change in mounting height or tilt can remove entire bands of false alerts from passing cars while keeping the important areas of your property in view. Use that mindset at your front door, and you will end up with a camera placement that serves you when you actually need to review video, not just when you are running the installation checklist.
Driveways, side gates, and fence lines: purpose built mounting heights
Driveways are where the 8 foot rule really collapses, because what you want from a driveway camera is often very specific; either a clear license plate, a recognisable face, or a wide overview of vehicles coming and going. A single outdoor security camera mounted high on the garage soffit will rarely do all three well, no matter how wide the advertised field of view or how many megapixels the sensor claims. Instead, think in terms of two roles and two heights; a lower camera for plates and faces, and a higher camera for vehicle colour, direction, and general coverage.
For license plate capture, mount a camera between 1 and 1,5 metres high, aimed straight down the path where cars enter or exit your property, and keep the angle as shallow as possible. This low camera height reduces headlight glare at night and keeps the plate within the sweet spot of the lens, which is crucial because most consumer camera systems do not have dedicated plate capture modes or variable shutter speeds. If you rely on a single high mounted camera at 3,5 metres, you will often end up with unreadable plates, especially when vehicles move quickly or when the video compression in your system is tuned for storage savings rather than clarity.
For overall driveway coverage, a second camera at around 2,7 to 3 metres can work well, angled to see the full length of the drive and any adjacent areas like garages or side doors. This higher mounting height helps you track movement patterns and see whether someone walked in from the street or emerged from behind a parked car, which is valuable context when you review security footage after an incident. The combination of low and high cameras also gives your security systems redundancy; if one camera’s night vision fails or its lens fogs up, the other may still provide usable video.
Side gates and fence lines demand a different approach, because here the goal is often to catch someone slipping through a narrow gap rather than to read a plate. Mounting an outdoor camera at 1,5 to 1,7 metres on the inside of the fence, slightly hidden behind a panel or post, usually beats a 3 metre exposed mount that looks impressive but misses faces. At this lower height, the camera placement keeps intruders within the centre of the frame as they pass through the gate, and it reduces blind spots caused by tall fences or overgrown hedges.
Many homeowners worry that a low camera is easier to tamper with, yet in these constrained areas the real risk is that a high camera never sees the person at all. A camera mounted at 3 metres above a narrow side path often ends up staring at the top of the fence and a strip of concrete, while the intruder’s face is hidden under the overhang. When you install security devices along fence lines, prioritise what the lens can actually see over how safe the housing looks from the street.
If you are integrating cameras with an alarm keypad or broader security system, treat each zone as a separate problem rather than mirroring heights for symmetry. A Honeywell alarm keypad, for example, might control both indoor sensors and outdoor cameras, yet the optimal camera height for a driveway is nothing like the best height for a back door. The more you tailor mounting height and angle to the specific behaviour at each entry point, the more your overall camera systems start to feel like a coherent security solution instead of a scattered collection of gadgets.
Balancing tamper resistance, smart features, and future proof placement
Once you start tuning camera height to specific tasks, you also need to think about how smart features behave at those heights, because modern security cameras are more than just passive lenses. On-device AI, person detection, and even basic facial recognition all depend on having enough pixels on target, which you only get when the camera height and angle keep faces or vehicles large in the frame. A thoughtful security camera mounting height guide therefore has to connect physical installation with the digital brain of your camera system.
Take night vision as a concrete example, since most outdoor security incidents happen in low light and many budget cameras struggle here. If you mount an Arlo Pro 5S or Blink Outdoor 4 too high, the IR LEDs throw light past the area where people actually walk, leaving them underexposed and grainy in the recorded video. By dropping the camera height to around 2 to 2,3 metres and slightly narrowing the angle, you keep subjects inside the IR hotspot, which often does more for real world security than upgrading to a higher resolution sensor (a pattern that shows up repeatedly in independent driveway and porch camera tests).
Smart analytics also change the tamper resistance equation, because a camera that reliably captures faces at 1,8 metres may be more valuable than a camera that never gets touched at 3 metres but only shows hats and shoulders. If you are using features like package detection or familiar face alerts on a Nest Cam Battery or Eufy SoloCam S340, those algorithms need clear, front-facing views to work well. Mounting at near eye level for these roles is not a luxury; it is a requirement for the advertised features to deliver anything close to their marketing promises.
There are still situations where tamper resistance should win, such as in shared access areas, rental properties, or exposed alleyways where cameras are obvious targets. In those cases, a high mounting height of 3 to 3,5 metres, combined with a slightly wider field of view, can keep the hardware safe while still providing enough coverage to trigger alarms or capture general movement. You can then pair that high camera with a more discreet, lower camera in a protected spot, creating a layered defence that balances coverage, identification, and hardware safety.
As camera systems evolve, more processing is moving from the cloud into the device itself, which changes how you should think about placement and upgrades. When your camera’s AI lives on the device, as many newer Reolink and Eufy models do, you gain resilience against Wi-Fi drops and subscription changes, but you also become more dependent on getting the physical installation right the first time. A well planned camera height today will keep paying off as firmware updates improve detection, while a poorly placed camera will only get more frustrating as smarter software keeps misfiring on bad angles.
To decide whether to favour tamper resistance or identification at any given spot, run a quick checklist: what evidence do you need most from this camera, how close will people or vehicles get, and how exposed is the hardware to casual damage? For a security conscious upgrader who has already lived through false alert fatigue and subscription paywalls, the next step is clear; audit every camera by asking what you are trying to catch, then adjust mounting height, angle, and placement until the video answers that question. Do not be afraid to lower a camera from 3 metres to 2 metres if it means finally getting a clear face at your front door or a readable license plate at your gate. In home security, what matters is not the advertised 1080p, but what it actually captures at 3am.
Key figures that show why camera height matters
- Industry testing of consumer security cameras shows that most built-in infrared night vision delivers usable detail only within about 7 to 9 metres, so mounting cameras higher than 3 metres often pushes people outside the effective illumination zone at night (summarised in multiple comparative lab tests on outdoor camera IR range).
- Forensic imaging guidelines used by many law enforcement agencies state that a face should occupy at least 120 pixels across the frame for reliable identification, which typical 1080p cameras only achieve when the subject is within roughly 3 to 5 metres at a shallow angle (see EN 62676-4 and similar video evidence standards on pixel-per-face requirements).
- Analyses of residential burglary patterns indicate that more than half of unlawful entries occur through front doors, back doors, and ground floor windows, which means that optimising camera height around these specific entry points yields a higher security return than focusing on high, wide overview shots (as reported in several home security industry summaries of break-in statistics).
- Field evaluations of budget and mid-range outdoor cameras show that mounting at 2 to 2,5 metres reduces unusable top-of-head footage by up to 40 percent compared with 3 to 3,5 metre installations, while maintaining similar resistance to casual tampering in typical suburban settings (based on aggregated results from independent driveway and porch camera tests).
- As a quick reference, aim for approximately 1,7 to 2 metres for facial identification at doors, 1 to 1,5 metres for license plate capture along driveways, 1,5 to 1,7 metres for narrow side gates, and 2,7 to 3 metres for general overview coverage where tamper resistance matters more than fine detail.