Understanding Solar-Powered Security Cameras
Exploring the Benefits of Solar-Powered Surveillance
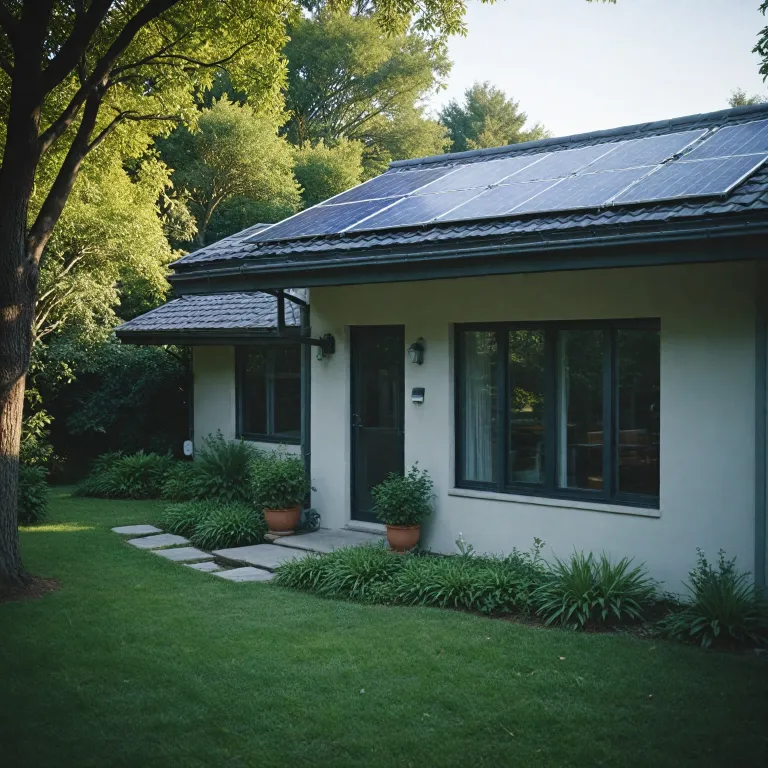
Solar-powered security cameras represent a significant advancement in home surveillance technology. By harnessing the power of renewable energy, these cameras offer several benefits that appeal to homeowners looking for a sustainable security solution. One of the primary advantages of solar surveillance is its independence from traditional power sources. As their operation is sustained by solar panels, these cameras provide an eco-friendly option that reduces energy bills and the dependency on electrical connections. Additionally, they come equipped with rechargeable batteries to store energy for cloudy days, ensuring consistent performance. The integration of wireless technology further enhances their appeal. With features like Wi-Fi connectivity, solar-powered cameras allow for seamless real-time video streaming and remote monitoring. This eliminates the need for complex wiring and allows for flexible camera placement. Another crucial aspect is motion detection. Many modern solar cameras are equipped with advanced human detection systems, ensuring they capture only relevant activity. Night vision capabilities also improve their effectiveness, with some models offering color night vision, providing clear images even in low-light conditions. In terms of cost-effectiveness, while the regular price of solar security cameras may be higher compared to traditional ones, the long-term savings on energy bills and the ease of installation often justify the initial investment. Plus, sale price events can offer additional savings. To ensure these cameras function optimally, homeowners must carefully consider factors like the placement of the solar panel to maximize exposure to sunlight and the capacity for cloud storage for video recordings. Furthermore, understanding why your solar-powered security camera isn't recording on the SD card can also aid in maintaining effective surveillance. Overall, solar-powered security cameras offer a relatively effortless yet powerful solution for enhancing home security, paving the way for a greener future in residential safety.Choosing the Right Solar Camera for Your Home
Finding the Solar Camera That Suits You Best
When it comes to enhancing your home security with a solar-powered camera, selecting the right model is key. With a plethora of options available, it's important to focus on the features that will best address your specific needs.- Power and Battery Life: Look for solar cameras with robust solar panels and efficient battery storage. A high-quality solar panel ensures continuous operation, while a long battery life extends functionality during low sunlight periods.
- Video Quality and Resolution: Opt for cameras that offer high-definition video quality, ensuring that you capture clear images day or night. Features like color night vision and enhanced image clarity can be crucial for effective surveillance.
- Motion and Human Detection: Advanced detection features, like motion detection and human detection, can minimize false alerts. This is vital for accurate intruder alerts and preventing unnecessary notifications.
- Connectivity and Storage: Depending on your preference, you may wish for your camera to offer cloud storage or include an SD card option. Wireless connectivity via WiFi can also add convenience by allowing remote access to live feeds.
- Ease of Installation: Consider cameras labeled as wireless outdoor for less complicated setups. If you’re aiming for easy integration, cameras that come with clear installation guides are worth considering.
- Price and Budget: Evaluate the balance between regular price and sale price. While a budget-friendly option is attractive, ensure that you do not compromise on crucial features.
Preparing for Installation
Getting Ready for a Seamless Setup
Proper preparation is key to ensuring a smooth installation process for your solar-powered security cameras. Before diving into the actual installation, a few important steps will enhance your experience.- Choose an Optimal Location: Find an ideal spot for your camera where it can receive direct sunlight and provide a clear view for surveillance. Consider areas with minimal obstructions to maximize solar panel efficiency.
- Check Compatibility: Make sure your wireless outdoor camera is compatible with your home network. Verify if the camera requires a specific wifi protocol and that your router is strong enough to maintain a reliable connection.
- Assess Power Needs: Evaluate the power requirements of your camera. Understanding the battery life and whether it will be supported fully by the solar panel is crucial for continuous operation.
- Ensure Appropriate Storage: Decide between local storage using an SD card or cloud storage for your video footage. Each option has its merits depending on your security needs.
- Gather Necessary Tools: Assemble tools like a drill for fixing the mounting plate. This ensures that once you start the installation, you have everything you need at your fingertips.
Step-by-Step Installation Guide
Gather the Necessary Equipment
To ensure an easy installation process for your solar-powered security camera, it’s crucial to have all the necessary equipment on hand. Begin by checking the camera box for components like the solar panel, mounting kit, battery, wifi module, and user manual. Don't forget tools such as a drill, screwdriver, and possibly a ladder for reaching high spots.
Locate the Ideal Placement
Find an area that not only offers optimal surveillance but also maximizes solar power absorption. The solar panel should be placed in a location with ample sunlight throughout the day. For most homes, this could mean rooftops, walls facing the sun, or even a bright spot in your backyard. Make sure the camera’s field of view is unobstructed and considers factors like motion detection range and night vision capabilities.
Ensure a Strong Network Connection
Before mounting, test your wifi signal strength at the proposed location. A strong signal is vital for wireless solar cameras to effectively transmit video feeds and notifications. If needed, consider investing in a wifi extender to boost the signal strength in remote areas of your property.
Mount Your Solar Panel and Camera
Once you've chosen the perfect spot, secure the solar panel and camera using the provided mounts. This step may require a helping hand to ensure the components are level and securely fastened. Use the provided screws and brackets, and consult the user manual for specific installation guidance tailored to your model. Position the camera to cover high-traffic areas for maximized security.
Connect and Test the Setup
After the components are mounted, connect the solar panel to the camera, ensuring the battery is fully charged and all connections are secure. Power on the camera and sync it with your home's wifi network. Test the motion detection and night vision features to confirm that they are functioning correctly. Also, check if the cloud storage service is operational and set according to your preferences.
Troubleshooting Common Installation Issues
Troubleshooting Challenges with Wireless Solar Cameras
When setting up your solar-powered security camera, users may experience some common issues that can interfere with optimal performance. Addressing these challenges promptly ensures your security system functions effectively and reliably. Below are some typical areas to troubleshoot when installing solar cameras.
Connectivity Troubles
Establishing a stable wifi connection for your wireless outdoor security camera is crucial for uninterrupted surveillance. If there are connection issues, consider the following solutions:
- Ensure your wireless network offers adequate coverage to reach the camera’s location.
- Minimize obstacles between the router and the camera, as structures can weaken signals.
- Check if the camera’s network settings are correctly configured.
Battery and Power Problems
Battery supply is vital for continuous operation of your solar security cameras. Issues with power can arise if the solar panel is not generating enough energy:
- Confirm that the solar panel is positioned for maximum sunlight exposure, as shaded areas reduce power efficiency.
- Check that the battery is properly connected and functioning—insufficient charge will impact battery life.
- Consider regular cleaning of the solar panel surface to prevent dust buildup, which can hinder energy absorption.
Video and Motion Detection
For top-notch surveillance, it’s crucial that your camera's motion detection and video functionalities are consistent:
- If video footage is unclear or the color night vision is compromised, ensure the camera lens is clean and unobstructed.
- Test motion detection settings to make certain they are adjusted to appropriate sensitivity levels for human detection.
- Review storage options, such as cloud storage, to ensure that detected events are adequately recorded.
Maximizing the Efficiency of Your Solar Camera
Enhancing Efficiency and Performance of Your Solar Camera
To truly make the most out of your solar-powered security camera, consider a few strategies and best practices that go beyond the initial installation. These measures will not only help you maximize efficiency but also ensure longevity and optimal performance.
Optimal Positioning and Maintenance
- Proper Angle: Ensure that your solar panel captures the maximum sunlight throughout the day. Adjust the angle based on the season, as sunlight positions shift.
- Regular Cleaning: Dust and debris on the solar panel can obstruct sunlight absorption. Clean the panel regularly with a soft cloth and a mild soap solution.
Battery Management
- Monitoring Battery Levels: Consistently check the battery status through the camera’s app or platform. Keeping the battery fully charged enhances battery life.
- Replacement Cycle: Solar-powered cameras may require battery replacement after a few years. Monitor battery performance and be prepared for timely replacement.
Leveraging Camera Features
- Motion Detection Settings: Customize motion detection zones and sensitivity to minimize false alerts. This conserves battery and storage.
- Night Vision Efficiency: Utilize features like color night vision to improve nighttime surveillance without overusing power and storage.
- Cloud and Local Storage: Optimize your storage by enabling cloud storage options if available, or effectively using local storage for video footage.
Network and Connectivity
- Stable WiFi Connection: Position your wireless solar camera within range of your home’s WiFi to ensure seamless video streaming and remote access.
- Security Upgrades: Regularly update your camera’s firmware to protect against network vulnerabilities and optimize performance.
Embracing these practices not only bolsters the functionality of your solar camera but also safeguards your home with reliable and efficient surveillance all year round. Remember that a little attention to detail can significantly enhance both the life and performance of your security device.