Understanding the Importance of Mounting Brackets
The Crucial Role of Proper Mounting Brackets
When setting up a security camera system, the significance of selecting the right mounting brackets should not be underestimated. Mounting brackets serve as the backbone of your camera installation, ensuring that your cameras are securely positioned to capture every angle necessary for optimal surveillance. Incorrect mounting can lead to misaligned feeds, rendering your security system less effective.
Mounting brackets are essential for various camera types, from fixed dome cameras to PTZ (pan-tilt-zoom) domes. A carefully chosen bracket such as a pole mount or wall mount ensures that cameras are optimally situated to cover targeted zones within your premises. For instance, an outdoor camera mounted on a sturdy wall mount can provide a panoramic view of the surroundings, particularly when complemented by a junction box for neat and weatherproof cable connections.
Moreover, the right brackets facilitate the adjustment of camera angles post-installation, enabling easy tweaks to adapt to evolving security needs. Installation sites vary, and camera mounts such as ceiling mounts or pendant mounts are vital in mounting on different positions like on ceilings or at corners.
Considering the price and functionality, your decision-making process should involve evaluating how a bracket’s strength and compatibility meet specific environmental challenges, particularly for outdoor setups. Certain mounts, like the white pendant mount, can seamlessly blend into varied architectures, while being durable to withstand weather conditions.
As you compare different mounting solutions in your cart, ensure compatibility with your existing cameras, bearing in mind potential additions like the adapter for broader system integrations. This will help avert common pitfalls such as inadequate support or incompatible mount brackets, ensuring long-term reliability and efficiency of your security infrastructure.
Types of Security Camera Mounting Brackets
Exploring Various Mounting Options for Security Cameras
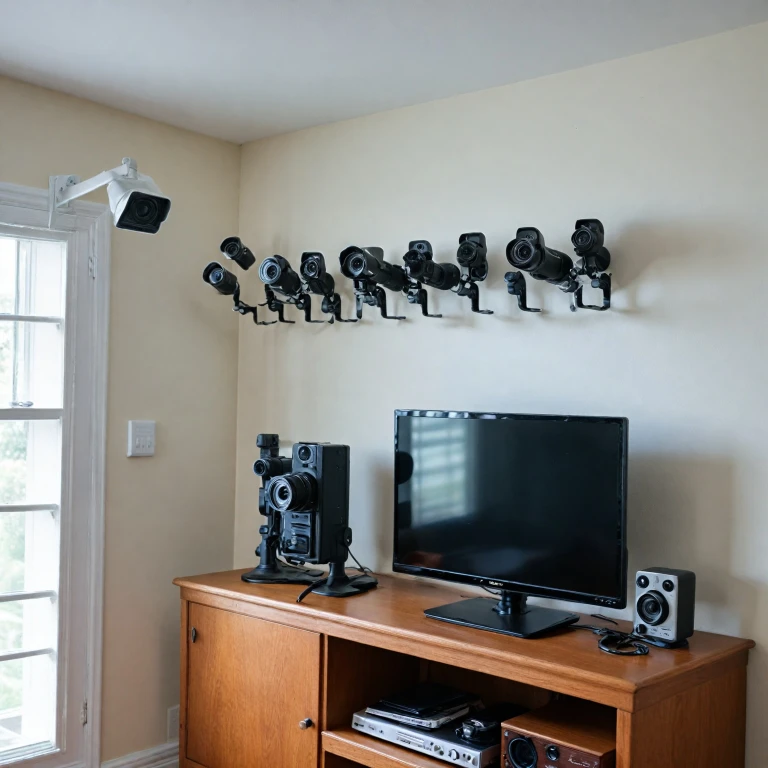
When setting up your home security system, understanding the variety of mounting brackets available is crucial. With countless options on the market, selecting the right camera mount can greatly affect the functionality and aesthetics of your security cameras. Starting with wall mounts, they are a common option for numerous security camera setups. Wall mounts are robust, allowing the camera to focus on specific areas, whether indoors or outdoors. For instance, an outdoor camera often benefits from a sturdy wall mount to withstand the elements. Brackets can also be combined with a junction box for a neat installation, avoiding cables running along your walls. Ceiling mounts offer a discreet and elevated vantage point, perfect for indoor security settings. Mount brackets for ceilings are handy when you aim for overhead surveillance. This option is particularly favored for fixed dome cameras, where the camera can blend into the surroundings. Adding to this list are pole mounts and corner mounts which present more specialized setups. Pole mounts are ideal for larger spaces, allowing cameras like pendant or PTZ dome cameras to oversee vast areas. They are exemplary in parking lots and large outdoor venues. Corner mounts, on the other hand, are suited for maximizing coverage by providing a broad angle from the junction of two walls. In specific cases, mount adapters can be used to convert between different camera mounts or to accommodate unique installation scenarios. These solutions are particularly useful when adapting a camera to a specific location that may require non-standard mounting. Remember that while the sale price might be a factor influencing your decision, the primary focus should be on how well the bracket suits your needs. Whether you are adding to your cart a pendant mount, a simple screw mount, or a quick view box setup, each choice significantly impacts the effectiveness and maintenance of your security cameras. White brackets are often chosen for aesthetic reasons, particularly in indoor settings where blending with home decor might be desirable. Conversely, robust outdoor mounts may prioritize durability and functionality over appearance.Factors to Consider When Choosing Mounting Brackets
Key Considerations for Selecting Camera Mounting Brackets
When setting up your home security system, choosing the right mounting brackets is crucial to ensure your cameras are both secure and effective. Here are some key considerations to keep in mind:- Compatibility: Make sure the mount bracket you choose is compatible with your security camera model. Mount brackets vary in design, catering to different camera types such as PTZ dome, fixed dome, and outdoor cameras.
- Mounting Location: Decide whether the mount bracket will be installed on a wall, ceiling, pole, or corner. For wall mount or ceiling mount options, it's essential to understand the differences in installation requirements and the viewing angles they offer.
- Bracket Material: The material of the bracket can impact durability and longevity, especially for outdoor camera installations. Look for weather-resistant materials for outdoor use to withstand various environmental conditions.
- Mounting Flexibility: Consider brackets that allow adjustable angles for enhanced flexibility. For instance, a pendant mount or a mount adapter offers more position adjustments, helping you to secure an optimal view.
- Security and Stability: Security cameras need stable support to avoid disruption in their field of view. Ensuring that mounts like pole mount or corner mount have a secure attachment to the structure is vital. Use a junction box for added stability and a neat cable management solution.
- Aesthetic and Color: If the appearance is important, choose a bracket color that matches or complements your camera or mounting surface, such as a bracket white finish. It helps in maintaining the aesthetic appeal of your living space.
- Cost Considerations: While shopping, add cart the mount bracket that meets your budget needs and functional requirements. Remember to compare prices, taking advantage of sale price options when available, to ensure you're getting the best value possible.
Installation Tips for Security Camera Mounting Brackets
Effective Setup Strategies for Your Home Security Camera Mounting Brackets
Proper installation of your home security camera mounting brackets is crucial to ensure optimal performance and coverage. Here are some tips to guide you:- Select the Right Spot: Position your cameras where they will have the maximum coverage of vulnerable areas like entrances, driveways, and backyards. Consider `corner mount` setups for broader views.
- Check the Surface Stability: Whether it's a `wall mount` or `ceiling mount`, ensure the surface is stable enough to hold the weight of the camera and bracket. For `outdoor camera` setups, confirm the `wall` or `pole mount` can withstand exposure to weather conditions.
- Secure with the Right Hardware: Use appropriate `screws` and anchors that match the material of your mounting surface. For instance, `concrete` walls require different screws than wooden surfaces.
- Utilize a `Junction Box`: A `junction box` can be highly beneficial for managing cables and protecting connections from weather. When setting up outdoor mounts, a junction box helps conceal and organize wiring effectively.
- Consider the Camera Type: Different types of cameras, such as `PTZ` cameras or `fixed dome` cameras, might require unique configurations. Utilize a `mount adapter` if your `system` requires versatility, such as transitioning from a `fix` to a `pendant mount`.
- Assess the `Mount Bracket`: Ensure the bracket is compatible with your camera. Brands typically specify suitable brackets designed to complement specific camera models and systems.
- Test the Field of View: Before finalizing installation, temporarily fix the camera to the mount and test its view. Adjust its angle to eliminate blind spots and get the best coverage.
- Check Local Laws and Regulations: Some areas have restrictions or requirements regarding security camera systems' installation. Research local laws to avoid legal issues.
Common Mistakes to Avoid with Mounting Brackets
Common Pitfalls with Security Camera Mounting Brackets
When installing a security camera system, the choice of mount bracket plays a crucial role. However, many often overlook the significance of the mounting process, leading to potential errors. Below, we highlight some common mistakes to avoid, ensuring the longevity and effectiveness of your security camera installation. Improper Selection of Mount Types- Don’t assume one-size-fits-all. Different environments require specific mounts—an outdoor camera might need a weather-resistant wall mount, while a ceiling mount could be suited for indoor fixed dome cameras.
- Ignoring the weight and type of camera. Consider an appropriate mount bracket for PTZ dome cameras that may weigh more than standard models.
- Ensure brackets are securely attached to walls using suitable anchors, especially for outdoor camera setups exposed to wind and rain.
- Avoid neglecting to screw mounts tightly. Loose brackets can lead to distorted camera angles or, worse, equipment falling.
- Junction boxes are often dismissed as unnecessary; however, they protect wires and improve camera aesthetics.
- Utilize a mount adapter when necessary to provide a stable fit for unconventional surfaces or camera models.
- Refrain from mounting cameras too high or low. Proper height ensures optimal field coverage and minimizes blind spots.
- Evaluate mounting surfaces: corners may require corner mounts, and poles might need specific pole mounts.
Maintenance and Troubleshooting of Mounting Brackets
Routine Maintenance for Long-lasting Performance
To ensure your security camera system remains effective and reliable, regular maintenance of the mounting brackets is crucial. Checking the brackets periodically helps prevent potential issues that could compromise your system’s performance.
- Inspect for Wear and Tear: Over time, mounting brackets, especially those installed outdoors, can suffer from weather-related wear. Look for signs of rust or cracking, particularly on ceiling mounts and wall mounts.
- Tighten Loose Components: Vibration from PTZ or fixed dome cameras might loosen screws and joints in the mount. Regularly check and tighten them to maintain alignment and stability.
- Cleaning: Dust and debris can accumulate, affecting camera movement and bracket white aesthetics. Use a damp cloth for indoor and outdoor mounts to keep them clean.
Troubleshooting Common Issues
Even with regular maintenance, issues can arise. Here are some solutions to commonly encountered problems:
- Misalignment: If your security cameras aren’t capturing the desired area, consider adjusting the mount bracket or re-aligning the camera. Proper placement is critical.
- Instability: An unstable view may indicate a wall mount or ceiling mount issue. Ensure all screws and mounts are securely tightened.
- Corrosion: Outdoor camera mounts can suffer from corrosion due to exposure. Consider switching to materials with weather-resistant coatings or sale price options specifically designed for robust ptz dome and outdoor camera installations.
Use proper tools when maintaining and fixing your mounting brackets to prevent damage to components. Following installation tips and being aware of potential mistakes discussed earlier can also aid in effective troubleshooting and prolong the life of your security camera system.