Understanding the Importance of Proper Camera Placement
Significance of Correct Camera Positioning
When it comes to securing your home with a Ring camera, the placement of your camera mounting solutions plays a pivotal role. Ensuring your camera is mounted correctly not only maximizes its coverage but also enhances its effectiveness in deterring potential intrusions.
Every security camera, whether it's a Ring floodlight cam or a stick cam, has an optimal point for maximizing monitoring capabilities. Incorrect positioning can lead to blind spots, thereby undermining the security of your property. Consideration of elements like height, angle, and environment can greatly influence how well your outdoor cam or indoor cam functions.
Proper placement is crucial for both the cam pro and the gen security cameras to avoid unnecessary capture of non-pertinent movements. These adjustments can also help in extending the cam battery life by reducing unnecessary activity detection.
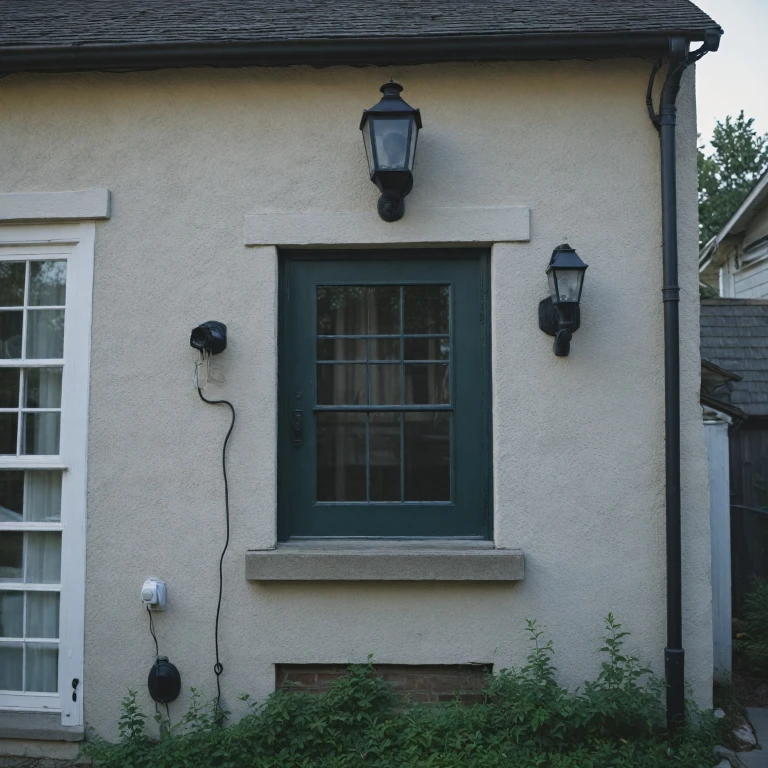
When positioning your camera, it’s important to focus on the areas of most vulnerability, such as entry points. A well-placed spotlight cam at your front or back door can effectively monitor visitors or deter unwelcome guests. Additionally, the right elevation ensures optimal field of view while a strategic stroke width setting can cover more ground.
Ultimately, the effectiveness of your security camera system, be it a base model or the pro version, heavily depends on how efficiently you mount and position the product. The reviews of successful camera installations often highlight the critical nature of placement and aim to help others in achieving the best security outcomes.
Tools and Materials Needed for Mounting
Gathering the Necessary Equipment for Your Ring Camera
Having the right tools and materials on hand is crucial for successful camera mounting. The specifics may slightly differ depending on whether you're dealing with the Ring Doorbell, Ring Floodlight, or any Ring Indoor or Outdoor Cam, yet some essentials remain consistent. Overall, it’s about ensuring a sturdy setup and maintaining optimal functionality.
Here’s a checklist of what you should have ready before you begin the installation process:
- Ring Camera Kit: This includes the camera itself, be it a stick cam, spotlight cam, or gen pro. The kit usually comprises mounting tools, if applicable.
- Mounting Plate: Often included with the cam, this base plate or mounting bracket is pivotal for fixing your cam securely.
- Screwdriver or Drill: Depending on whether your installation is indoors or outdoors, and if you're using a cam plug or cam battery, you'll need an appropriate tool for fastening.
- Level: Ensuring your cam is level is crucial for clear and concise footage.
- Ladder: If mounting high or on an outdoor cam, a stable ladder ensures safety.
- Anchor Screws: These are particularly important for mounting on surfaces like concrete or brick.
- Essential Accessories: Consider investing in additional accessories that might be required for specific scenarios, especially for areas with limited plug points or for rotating cams.
Remember, selecting the right tools and materials will set the stage for an efficient setup, reducing future complications. Be sure to also acknowledge reviews and user feedback on ring products to make informed decisions prior to starting your mounting project.
Step-by-Step Guide to Mounting Your Ring Camera
Position and Secure Your Camera Mount
Mounting your Ring camera is a straightforward process if you have the right tools and materials on hand. Start by deciding on the ideal location ensuring that the camera will cover a wide area, providing you with top-notch security angles. Consider potential blind spots and adjust your positioning accordingly.
Prepare Your Tools and Equipment
Before beginning, have your tools ready: a screwdriver, drill, and level, alongside your camera model's mounting supplies like the base plate or mounting plate specific to your Ring camera, whether it's the stick cam, floodlight cam, or any other.
Install the Base or Mounting Plate
Use your drill to create guide holes according to the mounting template. Secure the base plate to the wall surface with screws, positioning it flush to maximize stability. This step is crucial, especially for cams like the spotlight cam and outdoor cam, which require robust support.
Attach and Power Up Your Camera
Once the base is secured, snap your camera onto its mount. For models with a cam battery, ensure it’s fully charged before mounting. If your model uses a cam plug, connect it to your home’s power source securely. For help on connecting your camera to your network, follow this step-by-step guide.
Adjust Your View and Test Your Setup
Before wrapping up, adjust the camera angle by tilting or rotating it to cover crucial areas. To finalize the setup, engage in a test run to view real-time footage, ensuring there are no obstructions or blind spots. Your Ring camera is now ready to protect your home efficiently.
Common Mounting Mistakes and How to Avoid Them
Avoiding Common Missteps in Camera Mounting
When setting up your Ring camera, whether it's a cam battery, wired, or floodlight cam, ensuring it's properly mounted is crucial for maximizing its security capabilities. Here are some typical mounting blunders and strategies to prevent them:- Insecure Mounting Base: A secure foundation is paramount. A mounting plate or base plate that isn’t properly affixed can lead to your camera becoming misaligned or even falling. To avoid this, confirm the mounting base is firmly attached to a stable part of your home’s exterior or interior, whenever you're setting up your indoor cam, spotlight cam, or outdoor cam.
- Improper Camera Angle: Pointing your camera in the wrong direction can significantly reduce its effectiveness. Ensure that your camera, be it a stick cam or cam pro, is angled to cover key areas such as entry points like doors or windows. The pan tilt feature should be adjusted to cover a comprehensive view ensuring no blind spots.
- Neglect of Camera Product Type: Different products require different considerations. A ring doorbell or doorbell gen might need different mounting heights compared to a floodlight cam or security camera. Always reference the specific installation guidelines for the camera type you use to ensure optimal placement.
- Ignoring Environmental Factors: Remember that outdoor cameras, such as top-rated models like ring floodlight cams, need consideration for weather elements. Ensure that the cam is protected from direct rain or intense sunlight which might lead to reduced performance or damage over time.
- Forgetting About Power Sources: Whether your camera is using a cam plug or a battery-powered setup, plan your mounting location to accommodate power needs. Position your camera near a power outlet if it requires frequent charging or plug-in, or ensure you can easily reach it for battery replacements or charging.
Enhancing Security with Strategic Camera Angles
Maximizing Security through Strategic Camera Positioning
When it comes to ensuring the utmost security using your Ring camera, choosing the right angles can make a significant difference. Proper strategic positioning enhances the camera's ability to capture crucial areas.- Highlight Vulnerable Entry Points: Consider areas around the front and back doors, often targeted entry points for intrusions. Installing your doorbell cam or floodlight cam here can help monitor any suspicious movements.
- Cover Multiple Angles: Combining different models such as indoor cam, spotlight cam, or outdoor cam enhances the surveillance coverage. This strategy ensures that areas beyond the immediate vicinity of the camera are also monitored.
- Utilize Pan Tilt Features: If your Ring camera includes pan tilt capabilities, take advantage of this feature to cover wider spaces without needing multiple devices. This allows you to focus on high-traffic areas, like driveways or garden paths, that would otherwise require additional cameras.
- Consider Height and Stroke Width: Mount your camera at a height that eliminates blind spots but also keeps it out of reach from tampering. Aim for locations where the stroke width expands enough to capture a wide scene without obfuscating critical details.
Maintaining Your Mounted Ring Camera
Ensuring Longevity and Performance
Once your Ring camera is mounted in an optimal position, ongoing maintenance becomes crucial to ensure it continues to function at its best. Regular maintenance not only prolongs the life of your security device but also guarantees that it delivers top-notch performance at all times.- Regular Cleaning: Over time, your camera lens can accumulate dust, dirt, or moisture, which might obscure the view. Use a soft, lint-free cloth to clean the lens and the camera body gently.
- Checking the Mounting Stability: Ensure that your camera mount remains secure. Weather conditions or tampering could loosen the mount, so periodically check the tightness of your camera's base plate and mounting plate.
- Battery Maintenance: If you’re using the Ring cam battery, it's essential to monitor its charge levels. Depending on your usage and the camera model, you might need to recharge every few weeks or months.
- Software Updates: Keep your camera’s software up-to-date to benefit from new security features, bug fixes, and overall improved performance. Most devices have an auto-update feature, but it's good to verify this in your settings.
- Weatherproofing for Outdoor Cameras: If you're using a Ring outdoor cam or a cam pro, ensure that all seals are intact to protect against moisture ingress. Consider using weather shields for added protection, especially if the product is exposed to extreme weather.
- Reviewing Footage for Performance: Periodically review recorded videos to assess both the quality of footage and camera angles. This allows for adjustments in placement if certain areas are not well-covered or if infrared lighting in a floodlight cam isn’t fully functioning.