Understanding Night Vision Technology in Trail Cameras
Night Vision Capabilities in Trail Cameras
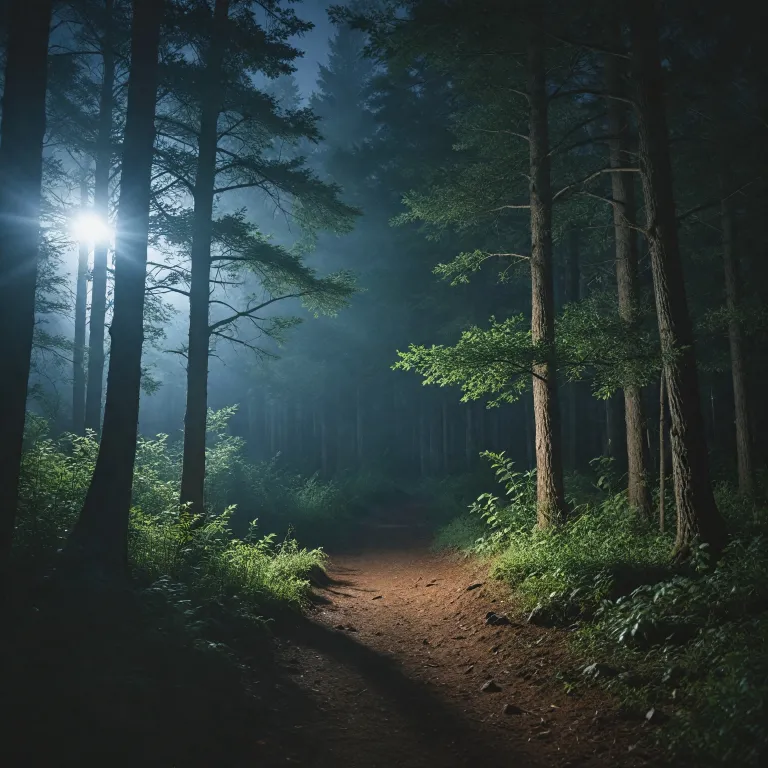
Understanding how night vision technology works in trail cameras is essential for addressing recording issues. Night vision enables your camera to capture images and videos in low-light settings, which is crucial for monitoring wildlife like deer or for security purposes.
Here are some key components that influence the night vision capabilities of your trail cam:
- Infrared LEDs: Many trail cameras, including Wosoda models, employ infrared LEDs to illuminate the surroundings without scaring away animals. These LEDs are vital in enhancing night recording but can contribute to other issues if not functioning properly.
- PIR Sensor: The passive infrared sensor is crucial in detecting movement within the detection zone. A malfunctioning PIR sensor could lead to false triggers, affecting battery life and resulting in missing night photos or videos.
- Image Sensor Technology: The quality of the cam's image sensor impacts the clarity of the recorded photos and videos. Cameras with advanced sensors generally offer better performance during nighttime recordings.
- Infrared Filters: Some models have infrared filters that shift automatically based on lighting conditions. If filters do not switch correctly, it might lead to problems with your deer camera capturing clear images at night.
While these aspects are pivotal, other factors like battery type and environmental conditions can play a big role. Lithium batteries, for instance, perform better in low temperatures compared to alkaline or rechargeable batteries, which could prevent issues during colder nights.
Read more about enhancing your night vision capabilities with specialized cameras that could address specific concerns in low-light environments.
Common Causes for Night Recording Failures
Identifying the Key Culprits Behind Night Recording Problems
When dealing with night recording failures in your trail cameras, it's central to understand that various elements can disrupt their functionality. Notably, the goal is to ensure your camera seamlessly captures clear night-time photos and videos, whether it's monitoring deer or providing general surveillance. Here are some common reasons you might encounter issues:
- Inadequate Power Supply: Trail cams demand significant power for infrared night vision capabilities. If you're using standard alkaline batteries, it could lead to insufficient power for optimal operation. Consider switching to lithium batteries or rechargeable batteries for enhanced battery life.
- Improper Placement: The positioning of your trail camera greatly impacts its night recording abilities. Ensure it's set up facing the east-west or north-south axis to avoid the effects of sunrise and sunset affecting your power-saving and recording functions.
- Lens and Sensor Problems: An obstruction or build-up on the lenses, or malfunctioning PIR sensors, can result in unclear night photos or false triggers. Regularly cleaning and maintaining these components is crucial.
- SD Card Issues: Sometimes, the card you’re using could be the root of the problems. Faulty or unformatted SD card cameras can lead to data loss. Always check and format the card regularly to ensure it's functioning properly.
Addressing these common causes with correct placement, ensuring optimal power sources, and maintaining regular maintenance can mitigate many of the typical night recording challenges. Understanding how to navigate these issues will aid in achieving the best performance from your trail camera during night operations.
Checking and Adjusting Camera Settings
Optimizing Your Trail Cam Settings for Effective Night Recording
To ensure your trail camera captures clear night-time photos and videos, it's crucial to focus on optimizing the camera settings. Here are some tips and considerations:
- Sensitivity and Detection Zone: Adjust the sensitivity of the PIR sensor to avoid false triggers caused by small animals or moving branches. This can make a big difference in battery life as well as the quality of the shots you capture. Setting the detection zone to cover the area where deer activity is expected will provide the best results.
- Orientation and Placement: Position your camera so that it faces north to south, as this minimizes overexposure from the sun that can interfere with the camera's ability to effectively record at night.
- Camera Resolution and Storage: Opting for a suitable photo and video resolution based on your storage capacity is vital. Make sure to format the card in the camera itself to ensure reliability. Cards with larger storage capabilities will allow for more footage and reduce the frequency of needing to change the cards.
- Lighting Conditions and Illumination: Some cameras have built-in infrared LEDs which are critical for capturing clear night images. Check that all LEDs are functioning properly and that your trail cam supports adequate night vision capabilities.
- Testing and Maintenance: Regularly test your setup by taking trial shots during various times to see how the camera performs. New settings may require a few trial days to find the optimal configuration.
Although adjusting these settings can resolve many common trail recording issues, sometimes the issues may be deeper. For a comprehensive solution, exploring
how security policies can limit your home camera usage may reduce potential problems with your trail camera.
Battery and Power Supply Considerations
Ensuring Your Trail Camera Stays Powered Through the Night
When tackling night recording issues with your trail camera, ensuring a reliable power supply is crucial. Let's delve into the factors that could be affecting your camera's battery performance and subsequently, the quality of night photos and videos.
- Choose the Right Batteries: Using high-quality lithium batteries can significantly extend the battery life of your trail camera when compared to alkaline options. Even though they may be more of an investment initially, the increased lifespan and consistent power output make them ideal for night recordings. Rechargeable batteries are also an option, but they might not last as long as lithium batteries in cold weather conditions.
- Battery Checkup: Always check the battery level of your trail cameras before setting them up for night footage. Weak batteries can lead to incomplete or blurred night recordings due to insufficient power, a common trail camera issue. Carry spare batteries to replace them as needed and avoid missing any action in the detection zone.
- Power-Saving Tips: You might need to adjust camera settings to conserve battery power. Reducing the number of photos per trigger or opting for shorter video lengths can help in saving battery life. Some trail cams also have a power-saving mode that can be utilized during nighttime operations.
- Card Compatibility: Ensure that your trail camera's memory card is compatible and adequately formatted to avoid any power-related camera issues. An incompatible or corrupt card can drain the battery quickly, disrupting your night recording sessions or causing false triggers.
- Environmental Fit: Equip your cameras with protective gear if they're stationed in environments with extreme weather conditions. Including rain covers or mounting them near shelter can prevent battery drain caused by cold weather or moisture.
By following these battery and power supply tips, you can avoid common power problems and ensure your trail camera is ready to capture all the night's activities, from deer movements to other wildlife adventures.
Environmental Factors Affecting Night Recording
Influencing Environmental Conditions
When troubleshooting night recording issues with your trail camera, it's important to consider the environmental factors at play. The placement of your camera can significantly impact its performance during nighttime.
- Placement Direction: It’s often recommended to face your trail camera either in an east-west direction to avoid sun glare that can interfere with the camera’s sensor and ensure better visibility for night recordings.
- Avoiding False Triggers: Vegetation or branches that move in the wind can cause false triggers, resulting in unwanted photo captures. Ensure that the detection zone is clear of such obstacles to optimize your trail camera’s performance.
- Weather Conditions: Moisture, rain, and snow can impact the camera’s lenses and its ability to capture clear night photos or videos. It might be helpful to place your camera under natural cover or consider investing in a weatherproof case to protect it from these elements.
Additionally, it can be worthwhile to periodically check the cleanliness of the camera's lenses and PIR sensor. These components play a critical role in the accurate capture of images during night hours. Dust or smudges on the lenses can diminish the quality of night photos, thus regular maintenance can preemptively solve potential issues.
Understanding these environmental elements can greatly enhance the night recording capabilities of your trail cams, helping you avoid common problems and ensuring optimal captures of nocturnal wildlife, like deer, on your property.
Advanced Troubleshooting and Support Options
Delving Deeper into Persistent Recording Challenges
When basic adjustments don't resolve your trail camera's night recording issues, a more advanced approach may be necessary. Addressing persistent obstacles often requires a combination of strategies.
- Review Firmware Updates: Manufacturers like Browning and other leading trail camera brands frequently release firmware updates that may improve camera performance, including addressing night vision issues. Checking the manufacturer's website or contacting their support can provide you with the latest updates.
- Check and Replace Components: Camera issues might be due to faulty internal components like the PIR sensor that affects detection. If your trail cam consistently fails to capture nighttime photos or videos, consider consulting with a technician or the camera’s support team for component replacements.
- Professional Calibration: Sometimes, the detection zone might not align with your desired area. Professional services can recalibrate the camera for enhanced accuracy, especially for detecting deer or avoiding false triggers.
- Factory Reset: If persistent problems arise after numerous troubleshooting attempts, a factory reset can sometimes solve these issues by reverting the camera to its original settings. Ensure to back up important data on your memory card before performing a reset.
- Test with Different Memory Cards: Issues can occasionally stem from faulty or incompatible storage cards. Testing with different cards, preferably high-quality ones formatted specifically for your trail camera, might offer a solution.
- Battery Type and Compatibility: Using the best batteries for your camera is imperative for dealing with unpredictable night recording problems. Experiment with different power sources, like lithium batteries or rechargeable batteries, to see if this affects performance. Persistent issues can sometimes be alleviated by switching from alkaline to lithium batteries, which are efficient in colder climates and provide a more stable power supply.
Engaging with these advanced troubleshooting techniques might require some trial and error, but they can play a crucial role in restoring efficient night vision capability in your trail cameras.